


Windows Vista Lightning Effect
Codectors :: Codectors Basket :: Archives :: Graphics Forum
Page 1 of 1

 Windows Vista Lightning Effect
![]() by Krzteli Fri Feb 27, 2009 10:40 pm
by Krzteli Fri Feb 27, 2009 10:40 pm
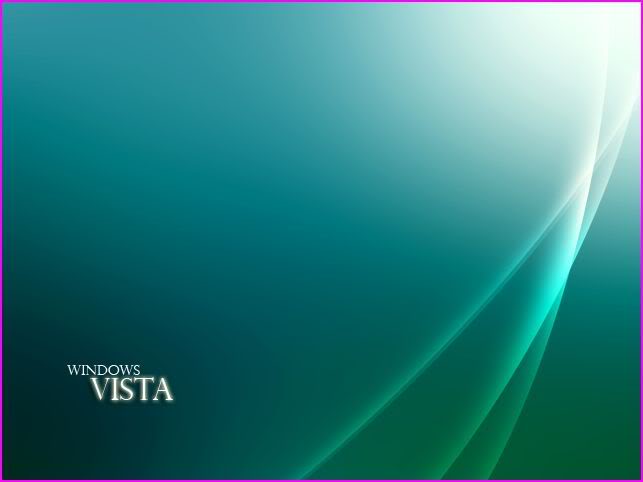
Hi! In this tutorial I will teach you how to make a simple Windows Vista wallpaper. For Vista users you are probably familiar with that eye catching lightning effect you see in your desktop. That is called Aurora Effect. It is so cool you might want to change your desktop from being dull into something extraordinary!
:full:
Lets start!
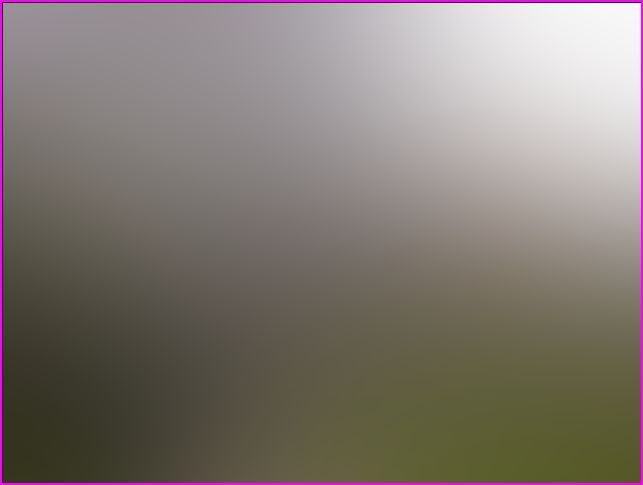
1. Open up a photo. Something with more light and dark colors in it. Here we will use my photo I had taken during Pasadena Flower Festival.

2. Go to Filter > Blur > Gaussian blur. Play with the settings. Here, I used Radius: 90 and 100%.
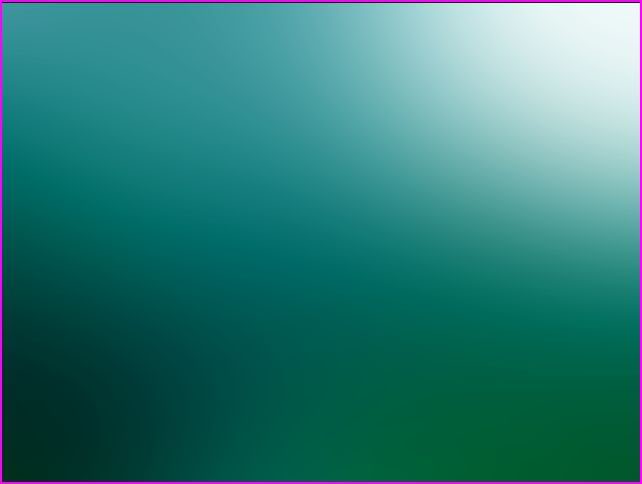
3. Now we will not have that color for our wallpaper obviously we will change the color. Go to Layer > Adjustment Layer > Color Balance. Play with the settings until it suits you. And our background will look something like this.
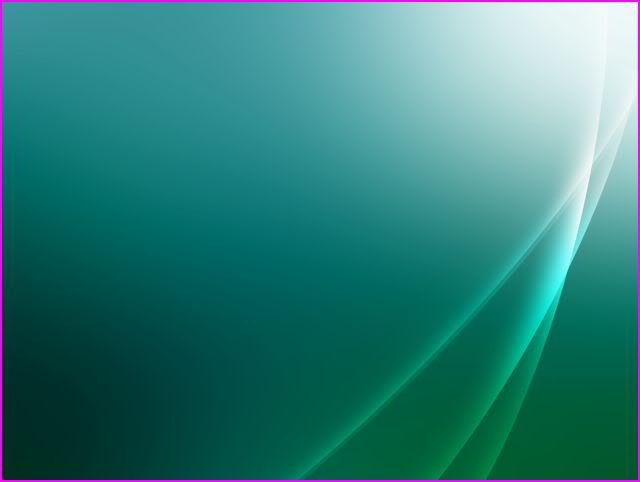
4. Now we will make the effect, which makes it different from XP. Select your Elliptical Marquee tool from your palette. Make a large selection all across your background. Doesnt necessary to be perfect.
5. Create a new layer by Layer > New > Layer. Select your default
brush tool and set the diameter size to 300 or bigger. Choose a white
foreground color. Brush on the inside of the marquee selection. Set the
mode to Overlay.

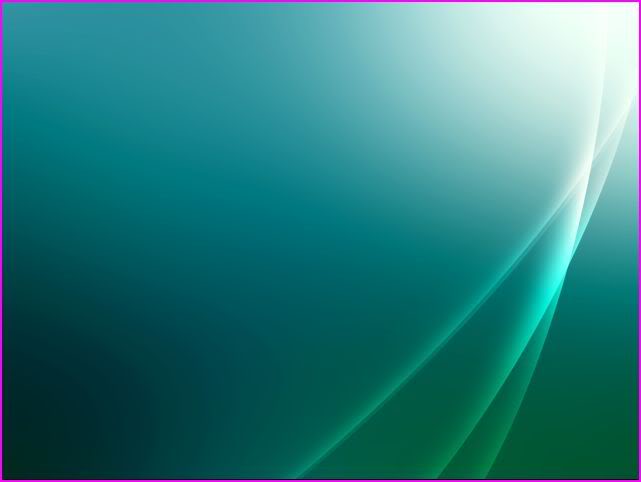
6. We will duplicate that layer so we wont have a hard time repeating
it. Layer > Duplicate Layer > Ok. You can transform the layers
and position it the way you want it.
Use the move tool to move it.
7. If you arent satisfied with the color you can add some color balance again.
8. Add some text if you want.
Thats it! ^___^
If you have any question, kindly post it here.
You can download my .PSD:
Click ME
:full:
Lets start!
1. Open up a photo. Something with more light and dark colors in it. Here we will use my photo I had taken during Pasadena Flower Festival.
2. Go to Filter > Blur > Gaussian blur. Play with the settings. Here, I used Radius: 90 and 100%.
3. Now we will not have that color for our wallpaper obviously we will change the color. Go to Layer > Adjustment Layer > Color Balance. Play with the settings until it suits you. And our background will look something like this.
4. Now we will make the effect, which makes it different from XP. Select your Elliptical Marquee tool from your palette. Make a large selection all across your background. Doesnt necessary to be perfect.
5. Create a new layer by Layer > New > Layer. Select your default
brush tool and set the diameter size to 300 or bigger. Choose a white
foreground color. Brush on the inside of the marquee selection. Set the
mode to Overlay.
6. We will duplicate that layer so we wont have a hard time repeating
it. Layer > Duplicate Layer > Ok. You can transform the layers
and position it the way you want it.
Use the move tool to move it.
7. If you arent satisfied with the color you can add some color balance again.
8. Add some text if you want.
Thats it! ^___^
If you have any question, kindly post it here.
You can download my .PSD:
Click ME

Krzteli
-
 Number of posts : 91
Age : 36
Location : lake elsinore california
Job/hobbies : kawaii^^,
Gfx Experience : High Council in Arts and Lit Creatives Team, GFX Designer in PxDesignz, Admin in GFX Core, Forum Mod
Points : 6
Registration date : 2009-01-22 -

 Similar topics
» another side effect
» SIG WITH MOUSE EFFECT
» Butterfly Effect
» Windows XP Shortcuts
» Branding ur windows with your name
» SIG WITH MOUSE EFFECT
» Butterfly Effect
» Windows XP Shortcuts
» Branding ur windows with your name
Codectors :: Codectors Basket :: Archives :: Graphics Forum
Page 1 of 1
Permissions in this forum:
You cannot reply to topics in this forum|
|
|